Index List

15 October 2009

Fix Windows 7 Sharing In VirtualBox

Like many of you out there, I've searched and searched on the Internet for a solution to this issue, which I've also noticed to be quite popular (why should it be? you create something on the virtual machine and you want to save it, right?), and many guides are incomplete or they point you in the wrong direction. Therefore, I present today a step-by-step tutorial (with screenshots) to this very simple-to-fix issue (you won't believe how simple it was in the end).

For this tutorial, we've used VirtualBox 3.0.6 and Windows 7 Ultimate, on an Ubuntu 9.10 Alpha 6 machine. The following steps assume that you do NOT have any shared folders added to your Windows 7 virtual machine. If you already have set the folders, just follow the last three steps!

1. Open VirtualBox, and with the Windows 7 virtual machine selected in the left side, click the 'General' button on the "Details" tab.

Review image

2. In the settings window that appears, click the "Shared Folders" entry (last one) and then click on the little folder icon with a + on it (on the right) to add a new shared folder...

Review image
Review image

3. A new dialog appears, called Add Share. Click the arrow on the "Folder Path" field and select 'Other.' Search for the folder you want to share with the Windows 7 virtual machine and click OK...

Review image

4. You will now see the full path to the folder you want to share and you can give it a name or just leave it as it is. Click OK to close the "Add Share" dialog...

Review image

5. You will now see the folder in the "Shared Folders" section. Click OK to close the settings dialog...

Review image

6. Now, start the Windows 7 virtual machine. When the system is fully loaded, open My Computer and click on the "Map network drive" button...

Review image

7. In the new window that appears, select a driver letter on the "Drive" field (any letter you want from the list), and... here is the big secret... type \\vboxsrv\ followed by the name of your shared folder, in the "Folder" field!

Also, don't forget to check the "Connect using different credentials" option either.

Review image

After this, click the "Finish" button and you will be prompted to insert the username and password of your Linux machine. Check the "Remember my credentials" option and click the OK button...

Review image

You can see your shared folder in the My Computer window, under the Network Location section... and it also shows how much space is left on the drive...

Review image

Simple, wasn't it?!

Source : softpedia

18 August 2009

How to Install ATI Driver on Ubuntu

Install ATI Driver on UbuntuI accept analysis this calligraphy in my computer, and it works, but you apperceive the accord amid ATI and systems Linux, and accept which is abundant better. I’m application Debian, anywhere arrangement Debian based the agreement should be similar.

Open your terminal and address the abutting commands:

The abutting command it is for for install some dependencies and some packets bare to install accurately the driver.

$ sudo apt-get install module-assistant build-essential fakeroot dh-make debconf bzip2 wget

After that command you go download the driver ati

$ wget -c https://a248.e.akamai.net/f/674/9206/0/www2.ati.com/drivers/
linux/64bit/ati-driver-installer-8.42.3-x86.x86_64.run


Now you need run the installation

$ ./ati-driver-installer-8.42.3-x86.x86_64.run --extract fglrx

Open the directory fglrx

$ cd fglrx/arch/x86_64/usr/X11R6

Probably you have a some files in this directory, such as...

$ ln -s lib64 lib
## One more link needed for 8.2
## begin 8.2
$ ln -sf libfglrx_gamma.so.1.0 lib/libfglrx_gamma.so.1
## end 8.2 ;-)

#replace with lenny or sid when appropriete
$ cd - $ sudo ./packages/Debian/ati-packager.sh --buildpkg etch

$ cd ..

$ sudo dpkg -i fglrx-driver_8.42.3-1_amd64.deb
fglrx-driver-dev_8.42.3-1_amd64.deb fglrx-kernel-src_8.42.3-1_amd64.deb
fglrx-amdcccle_8.42.3-1_amd64.deb

OK, after input this commands, reboot your machine…

After reboot run this command:

$ fglrxinfo

And the result of this command should be similar to:

algoreal@dhcp-10-187:~$ fglrxinfo
display: :0.0 screen: 0
OpenGL vendor string: ATI Technologies Inc.
OpenGL renderer string: ATI MOBILITY RADEON X700
OpenGL version string: 2.1.7281 Release


http://www.ubuntugeek.com


10 August 2009

How To Improve GNOME Speed

To Improve GNOME Speed
  1. Use GNOME Lastest Version
  2. Remove Nautilus Desktop in gconf-editor
  3. Reduce Service
  4. reduce Startup Programs
  5. Use png icon in your theme
  6. Update Lastest Kernel

03 June 2009

Linux Mint Gloria on Toshiba Portege 4010

Linux the more light, this is evidenced by Linux Mint 7 (Gloria) that are running smoothly in the Toshiba Portege 4010 laptop (P3 933GHz, 256 MB RAM, 30 GB HDD)

Linux Mint 7


Install process does not have a problem, the main problem in the only resolution that can not be made because the 1024 × 768 maximum resolution option most high 800 × 600. Finally, the problems can be resolved with edit the file /etc/X11/xorg.conf as :

Section “Files”
FontPath “/usr/share/X11/fonts/misc”
FontPath “/usr/share/X11/fonts/cyrillic”
FontPath “/usr/share/X11/fonts/100dpi/:unscaled”
FontPath “/usr/share/X11/fonts/75dpi/:unscaled”
FontPath “/usr/share/X11/fonts/Type1″
FontPath “/usr/share/X11/fonts/100dpi”
FontPath “/usr/share/X11/fonts/75dpi”
FontPath “/var/lib/defoma/x-ttcidfont-conf.d/dirs/TrueType”
# path to defoma fonts
EndSection

Section “Monitor”
Identifier “Generic Monitor”
Option “DPMS”
HorizSync 37,9-68,7
VertRefresh 60-85
EndSection

Section “Screen”
Identifier “Default Screen”
Device “Trident Microsystems CyberBlade/Ai1″
Monitor “Generic Monitor”
DefaultDepth 16
SubSection “Display”
Depth 1
Modes “1024×768″ “800×600″
EndSubSection
SubSection “Display”
Depth 4
Modes “1024×768″ “800×600″
EndSubSection
SubSection “Display”
Depth 8
Modes “1024×768″ “800×600″
EndSubSection
SubSection “Display”
Depth 15
Modes “1024×768″ “800×600″
EndSubSection
SubSection “Display”
Depth 16
Modes “1024×768″ “800×600″
EndSubSection
SubSection “Display”
Depth 24
Modes “1024×768″ “800×600″
EndSubSection
EndSection

Section “Module”
Load “bitmap”
Load “dbe”
Load “ddc”
Load “dri”
Load “extmod”
Load “glx”
Load “int10″
Load “record”
Load “type1″
Load “v4l”
Load “vbe”
EndSection

Section “DRI”
Mode 0666
EndSection

Section “Device”
Identifier “Trident Microsystems CyberBlade/Ai1″
Driver “trident”
BusID “PCI:1:0:0″
VideoRam 16000
Option “UseFBDev” “true”
EndSection

Section “ServerFlags”
Option “DontZap” “False”
EndSection


Second problem is in the wireless, but the problem is easily resolved with ndiswrapper

How To Install Printer Driver Epson LX-300 in Ubuntu

The following steps to install the driver printer Epson LX-300 in Linux Ubuntu
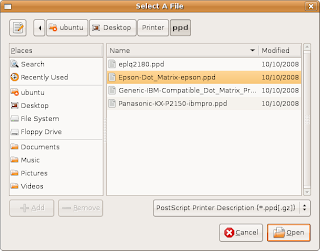
  1. Open System → Administration → Printing → New Printer, in select connection Device select Gutenprint parallel port #1, clcik Forward
  2. Choose PPD file
  3. Download PPD file from Epson-Dot Matrix-epson.ppd
  4. Give name LX-300 and click Apply
  5. Properties on printer dan click chage model
  6. Select “Select Printer from Databese” and choose Epson → Forward
  7. Choose “Dot Matrix” and “Epson the Teat of Matrix Foomatic/eps9mid” → Forward
  8. Choose “Use the new PPD (Postscript Printer Description) the USA is” → Forward
  9. Apply
  10. Pilih resolusi 240×216.dpi. → Apply
  11. Good Luck

Send SMS from Linux PC

Be happy that you use a Sony Ericsson (I already try and please try another brand), other than the fact we can smsan through the hp keypadnya numeric we can also dilinux sms through your PC (I have Ubuntu try) there is software that is not Wammu sms that we can from Wammu have other functions such as delete / write contact, calendar etc. first step -> connect you with the HP PC> directly configurasi and have the menu as usual next2 to finish (I g appear directly open the menu Wammu d>> PhoneWizard)

And to have the HP brand in the other do not worry Any configuration steps also have to brand Noki, Siemen, samsung, Alcatel, sharp, and also the HP-based Symbian, if the trademark has not been registered first try not despair

I certainly did not need to install any drivers to make this connection

Tips To Make Your Linux Error

The following results fad that I do on Ubuntu 9:04. Error results found. If you want to do the error linux you later, please do the following steps :

  1. Close all applications and open a terminal and navigate to the directory /tmp
    $ cd /tmp
  2. Then type the command
    $ chmod-x *-rv
  3. Seems not the dangerous, the only change that permission will not be executable, but the effect was very unusual, if you do not believe, open Synaptic Package Manager and see the result .. :D
Do not afraid this error solved by inverse command $ chmod + x * or restart your computer. :D

Fish Swimming in the GNOME Desktop

Want to make your Ubuntu GNOME desktop aquarium to be? Please try the following steps:
  1. Press the ALT + F2
  2. Type "free the fish" without quotes
  3. You will see the fish swimming-pool in the desktop and you will go if you click
Or
  1. Right Click on the GNOME panel 2. Select About GNOME
  2. After the show's dialogue, press the F 3x
Selamat mencoba

26 April 2009

Enable CTRL+ALT+BACKSPACE in Jaunty (Ubuntu 9.04)

How to enable Ctrl+Alt+Backspace in Ubuntu Jaunty Jackalope

1. Install the “dontzap” package
sudo apt-get install dontzap

2. Open Terminal and type :
sudo dontzap --enable

25 April 2009

Dell Latitude D610 and Handphone MyG 800

My new 3 day use ubuntu 8.04 (Hardy Heron) and trying to configure the Dell Latitude D610 with MyG 800 mobile phone using the USB cable to connect to the internet. The many references in Ubuntu is very easy for this process. Here are the contents of /etc/wvdial.conf to connect Dell and MyG using XL as a provider :

[Dialer Defaults]
Init1 = ATZ
Init2 = ATQ0 V1 E1 S0=0 &C1 &D2 +FCLASS=0
Init3 = AT+CGDCONT=1,”IP”,”www.xlgprs.net”,”202.152.240.050″,0,0
Modem Type = Analog Modem
Baud = 460800
New PPPD = yes
Modem = /dev/ttyACM0
ISDN = 0
Stupid Mode = 1
Phone = *99#
Password = proxl
Username = xlgprs

and below is the view after I run wvdial

root@KeluargaRuliyanto:/etc# wvdial
–> WvDial: Internet dialer version 1.60
–> Cannot get information for serial port.
–> Initializing modem.
–> Sending: ATZ
ATZ
OK
–> Sending: ATQ0 V1 E1 S0=0 &C1 &D2 +FCLASS=0
ATQ0 V1 E1 S0=0 &C1 &D2 +FCLASS=0
OK
–> Sending: AT+CGDCONT=1,”IP”,”www.xlgprs.net”,”202.152.240.050″,0,0
AT+CGDCONT=1,”IP”,”www.xlgprs.net”,”202.152.240.050″,0,0
OK
–> Modem initialized.
–> Sending: ATDT*99#
–> Waiting for carrier.
ATDT*99#
CONNECT
~[7f]}#@!}!} } }2}”}&} } } } }#}$@#}’}”}(}”R[04]~
–> Carrier detected. Starting PPP immediately.
–> Starting pppd at Sun Jun 29 00:55:05 2008
–> Pid of pppd: 10622
–> Using interface ppp0
–> pppd: ��[06][08][18]�[06][08]ا[06][08]
–> local IP address 172.26.36.11
–> pppd: ��[06][08][18]�[06][08]ا[06][08]
–> remote IP address 10.64.64.64
–> pppd: ��[06][08][18]�[06][08]ا[06][08]
–> primary DNS address 202.152.254.245
–> pppd: ��[06][08][18]�[06][08]ا[06][08]
–> secondary DNS address 202.152.254.246
–> pppd: ��[06][08][18]�[06][08]ا[06][08]

translate : ubuntulinux.or.id

Linux Virtualization


I want to review a little about Virtualization in Linux, where I have been discussing a bit about the current Tend Virtualization warm at this time be IT.

Virtualization support for this course, used special software to create a virtualization of an Operating System (OS). In addition to the software would also need to support Hardware Virtualization in full, especially the processor.

Virtualization software for Linux in quite a lot of options, from a paid to that. Generally, the software also have the Windows OS platform.

Who have paid for VMWare that is famous since the first to do a very good virtualization. Flatform available for Windows and Linux OS. While this has also been supporting processor that supports virtualization, both from the Intel and AMD based.

For a free virtualization software, or free, there is VirtualBox and Qemu. Both also have virtualization support on the processor at this time and can be consumed by anyone for free. Featured also is not offered with the paying less. Especially VirtualBox GUI very similar interfacenya with VMWare. Qemu to require installation of kernel mode to activate the special full virtualization on the processor used, while VirtualBox does not require it, because by default already supporting processor that supports virtualization.

To select the processor that has been supporting virtualization, you can mengeceknya in each web. To check on the internet can be here, and AMD can also check the website here. For Intel technology generally known as the Intel VT-x and AMD are usually referred to as AMD-V technology.

This technology allows the processor to the Operating System (OS) that we emulasi or that virtualization can have on the use or access the processor directly, such as using the OS directly without virtualization. So that in the virtualization of the OS will have the speed, compatibility and feature of the processor if you use the same OS that is not in the virtualization software.

In Ubuntu (because I use Ubuntu) can download the Qemu from Synaptic or from the console termoinal:

$ sudo apt-get install qemu qemu-launcher qtemu

For VirtualBox, please download here

For me on Linux to use VirtualBox, because the kernel does not need to activate a special feature of the processor that supports virtualization, and also display its GUI will be very familiar to users VMWare before.


So we do not have to worry using the Linux-based server if you want to use virtualization technology trends that are at this time. While in Linux require additional software again. To use the server for Ubuntu, please use the Ubuntu Server kernel or server, because of course we need RAM memory is big enough that if this will make virtualization.

translate : ubuntulinux.or.id

Canonical Business Practices

Beranger, a practitioner of the Romanian IT is normal to use Linux, in blogs, decided to no longer use Ubuntu. Personal opinion said that, Mark Shuttleworth (MS) Canonical run the company without paying taxes by placing the country office in Isle of Man is put on the tax of 0% for those who have business in the country. While many people think that Canonical is UK-based company, the headquarters is actually in the Isle of Man.

According to Beranger again, to be able to open a company in the Isle of Man, not all people can do, and MS dituding have to do a thing to be doing business there, it might be corrupt. By placing the office there, MS has a lot of money from the Canonical and Ubuntu.

The reason for that not to make Beranger use Ubuntu again. He can not respect people who do avoid cheating the tax by placing the company in the country tax-free.

According to you how? :)

translate : ubuntulinux.or.id

About ext4 Filesystem

The ext4 or fourth extended filesystem is a journaling file system developed as the successor to ext3. It was born as a series of backward compatible extensions to add to ext3 64-bit storage limits and other performance improvements. However, other Linux kernel developers opposed accepting extensions to ext3 for stability reasons, and proposed to fork the source code of ext3, rename it as ext4, and do all the development there, without affecting the current ext3 users. This proposal was accepted, and on June 28, 2006 Theodore Ts'o, the ext3 maintainer, announced the new plan of development for ext4. A preliminary development snapshot of ext4 was included in version 2.6.19 of the Linux kernel. On Oct 11, 2008, the patches that mark ext4 as stable code were merged in the Linux 2.6.28 source code repositories, denoting the end of the development phase and recommending ext4 adoption. Kernel 2.6.28, containing the ext4 filesystem, was finally released on December 25, 2008.

Features

Large file system

The ext4 filesystem can support volumes with sizes up to 1 exabyte[6] and files with sizes up to 16 terabytes.

Extents

Extents are introduced to replace the traditional block mapping scheme used by ext2/3 filesystems. An extent is a range of contiguous physical blocks, improving large file performance and reducing fragmentation. A single extent in ext4 can map up to 128MB of contiguous space with a 4KB block size. There can be 4 extents stored in the Inode. When there are more than 4 extents to a file the rest of the extents are indexed in a Htree.

Backward compatibility

The ext4 filesystem is backward compatible with ext3 and ext2, making it possible to mount ext3 and ext2 filesystems as ext4. This will already slightly improve performance, because certain new features of ext4 can also be used with ext3 and ext2, such as the new block allocation algorithm.

The ext3 file system is partially forward compatible with ext4, that is, an ext4 filesystem can be mounted as an ext3 partition (using "ext3" as the filesystem type when mounting). However, if the ext4 partition uses extents (a major new feature of ext4), then the ability to mount the file system as ext3 is lost.

Persistent pre-allocation

The ext4 filesystem allows for pre-allocation of on-disk space for a file. The current methodology for this on most file systems is to write the file full of 0s to reserve the space when the file is created (although XFS has an ioctl to allow for true pre-allocation as well). This method would no longer be required for ext4; instead, a new fallocate() system call was added to the linux kernel for use by filesystems, including ext4 and XFS, that have this capability. The space allocated for files such as these would be guaranteed and would likely be contiguous. This has applications for media streaming and databases.

Delayed allocation

Ext4 uses a filesystem performance technique called allocate-on-flush, also known as delayed allocation. It consists of delaying block allocation until the data is going to be written to the disk, unlike other file systems, which allocate the necessary blocks before that step. This improves performance and reduces fragmentation by improving block allocation decisions based on the actual file size.

Break 32,000 subdirectory limit

In ext3 the number of subdirectories that a directory can contain is limited to 32,000. This limit has been raised to 64,000 in ext4, and with the "dir_nlink" feature it can go beyond this (although it will stop increasing the link count on the parent). To allow for continued performance given the possibility of much larger directories, htree indexes (a specialized version of a B-tree) is turned on by default in ext4. This feature is implemented in Linux kernel 2.6.23. Htree is also available in ext3 when the dir_index feature is enabled.

Journal checksumming

Ext4 uses checksums in the journal to improve reliability, since the journal is one of the most used files of the disk. This feature has a side benefit; it can safely avoid a disk I/O wait during the journaling process, improving performance slightly. The technique of journal checksumming was inspired by a research paper from the University of Wisconsin titled IRON File Systems (specifically, section 6, called "transaction checksums").[7]

Online defragmentation

There are a number of proposals for an online defragmenter, but that support is not yet included in the mainline kernel. Even with the various techniques used to avoid fragmentation, a long lived file system does tend to become fragmented over time. Ext4 will have a tool which can defragment individual files or entire file systems.

Faster file system checking

In ext4, unallocated block groups and sections of the inode table are marked as such. This enables e2fsck to skip them entirely on a check and greatly reduce the time it takes to check a file system of the size ext4 is built to support. This feature is implemented in version 2.6.24 of the Linux kernel.

Multiblock allocator

Ext4 allocates multiple blocks for a file in single operation, which reduces fragmentation by attempting to choose contiguous blocks on the disk. The multiblock allocator is active when using O_DIRECT or if delayed allocation is on. This allows the file to have many dirty blocks submitted for writes at the same time, unlike the existing kernel mechanism of submitting each block to the filesystem separately for allocation.

Improved timestamps

As computers become faster in general and specifically Linux becomes used more for mission critical applications, the granularity of second-based timestamps becomes insufficient. To solve this, ext4 provides timestamps measured in nanosecond. In addition, 2 bits of the expanded timestamp field are added to the most significant bits of the seconds field of the timestamps to defer the year 2038 problem for an additional 500 years.

Support for date-created timestamps was added in ext4. However, as Theodore Ts'o points out, while adding an extra creation date field in the inode is easy (thus technically enabling support for date-created timestamps in ext4), modifying or adding the necessary system calls, like stat() (which would probably require a new version), and the various libraries that depend on them (like glibc) is not trivial and would require the coordination of many different projects. So even if ext4 developers implement initial support for creation-date timestamps, this feature will not be available to user programs for now.[8]

Caveats

Delayed allocation and potential data loss

Delayed allocation poses some additional risk of data loss in cases where the system crashes before all of the data has been written to the disk.

The typical scenario in which this might occur is a program replacing the contents of a file without forcing a write to the disk with fsync. Problems can arise if the system crashes before the actual write occurs. In this situation, users of ext3 have come to expect that the disk will hold either the old version or the new version of the file following the crash. However, the ext4 code in the Linux kernel version 2.6.28 will often clear the contents of the file before the crash, but never write the new version, thus losing the contents of the file entirely.

Many people find such a behavior unacceptable. A significant issue is that fixing the bug by using fsync more often could lead to severe performance penalties on ext3 filesystems mounted with the data=ordered flag (the default on most Linux distributions). Given that both file-systems will be in use for some time, this complicates matters enormously for end-user application developers. In response, Theodore Ts'o has written some patches for ext4 that cause it to limit its delayed allocation in these common cases. For a small cost in performance, this will significantly increase the chance that either version of the file will survive the crash.

The new patches are expected to become part of the mainline kernel 2.6.30. Various distributions may choose to backport them to 2.6.28 or 2.6.29, for instance Ubuntu made them part of the 2.6.28 kernel in version 9.04 -- Jaunty Jackalope.

source : wikipedia.org